Speedrunning the Fundamentals of Patch Diffing with Ghidra and CVE-2024-38063
I sat down over Christmas and took notes on all the various, varied avenues I want to explore; the arcane arts I want to gain mastery in and much like when doing the NAND2TETRIS program, discover which areas I actually do not enjoy working within.
Patch diffing is an area I have been very interested in for a while; ‘patch Tuesday, exploit Wednesday’ from the days of old makes me incredible nostalgic for a time I didnt even experience, stolen valor and whatnot.
What follows is a primer on essentially getting your toolkit together and how to navigate pitfalls that I unfortunately did not avoid. This is a mashing of teachings from dozens of blogs and tuts; there is (until now) no single resource that spells all this shit out, as everything I have come across is the embodiment of pic rel
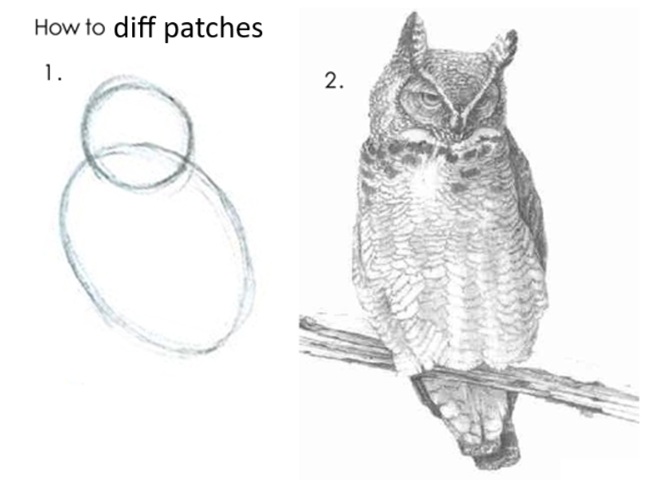
You know the incredible thing about memes is I dont even need to include the labels that usually live at the bottom of this picture for you to get it. I studied memetics at uni; it is an incredible fascinating topic, and it makes perfect sense that we are slowly moving to a post state where only the fragments of an idea are needed to convey the meaning, because it lives rent free in all our heads, so deeply embedded in our concisness.
TABLE OF CONTENTS
A TOC, this is new. Yeah this is going to be a long post. This is why I had to read so many different sources and why I am entitled to be glib about the process; theres a LOT you need to do before you even begin trying to trigger your first crash.
-Kernel Debugging with Debugger in VM via Network Debugging
-Kernel Debugging with Debugger on Host
-Verifying connection with windbg
Astute readers (and or those who sat my presentation) will note there is no section for actually writing the exploit. That was completley unintentional when I set down this path; I didnt realise that this (one collection of every stupid step that needs to be taken) doesnt actually exist yet.
Necessary Tools
-Ghidra Obviously we need this one. Ensure you get the latest version from the NSA repo. This is not a joke. Unzip somewhere you want to work from; there is no installer.
-BinDiff This does literally what the name says; it will diff two bins. This is pretty much the meat and potatoes of how patch diffing works; diff the patch against the non patched version.
Grab the compiled release, I see no reason to suffer through compiling it yourself; it comes from the Google repo, its as safe as Ghidra. I will make no further comments on this matter.
Install the msi. Take note of where it is installed, this information will come up later.
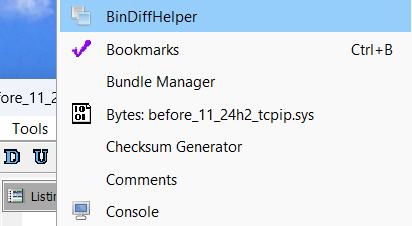
-BinDiffHelper As the name implies, this is a Ghidra extension to help BinDiff integrate with Ghidra. Unzip and place the contents into the “Plugins” folder where you unzipped Ghidra.
-BinExport Another Ghidra extension to further integrate what BinDiff is doing into Ghidra. Do the same as BinDiffHelper.
-Java Development Kit I used 21 for reasons I have forgotten. I cannot recall why and it is the middle of the night, I am not about to test with another version. Install it.
-ProcessExplorer Yes you read that right. Process Explorer. From sysinternals. Not procmon mind you, procexp. It is needed to dig yourself out of a pitfall you will encounter. Download it and put it somewhere, we dont need it yet.
Acquiring Patches
Updates can be found in c:\windows\software distribution\download
These will usually come in cabinent files.
use 7z and extract or
expand -f:* UPDATE_FILE EXTRACT_LOCATION
You can use ./ to put it where you are if youve already got it in a folder
Patched versions of files live in c:\windows\winsxs
You can also find them at https://winbindex.m417z.com/
I have found this to be a very good source. I know nothing about the author and how reputable it is, but for the purposes of a short training demo and blog post, it was suffecient.
If you are wanting a higher degree of trust however, certainly use the files contained within the windows folder locations!
Now this is some insanely obvious advice on the surface, but I am ashamed to say it caught me out. If you have acquired a patch for say Windows 11, and you are looking to diff it against the unpatch file, it MUST be from the same OS! I cannot believe I wasted half a Saturday wondering what the flying fuck was going on when I tried to compare W10 and W11 files together.
BUT, it goes even more granular! Much like block upgrades to fighter planes, Windows subversions also are incompatable. W10 20H2 is a COMPLETLEY different beast to W10 22H2. You must compare not just similar blocks, but the SAME.
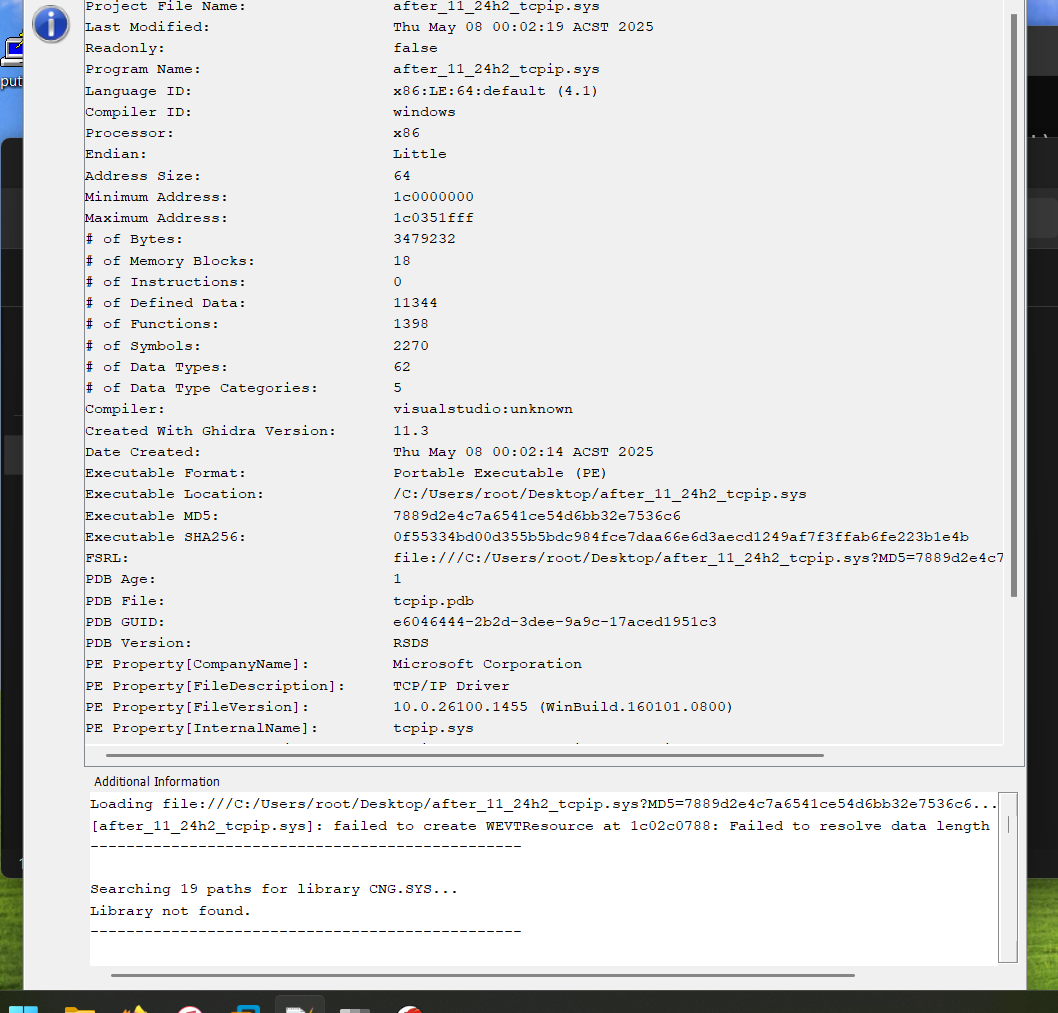
For the purposes of this exercise, we will be downloading tcpip.sys that I have uploaded. This is your prepatch, and this is your post patch. I have eloquently named them thusly before_11_24h2_tcpip.sys and after_11_24h2_tcpip Never fear, it matters not at all what you name them if they are the right files; the symbol server cares only for the hash, not the name.
Setting up Ghidra
Run the ghidraRun.bat file and when you are sternly told “NO ACTIVE PROJECT”, we will go ahead and make one.
File -> New Project -> Non-Shared Project -> Call it whatever you like and put it wherever you like -> Finish
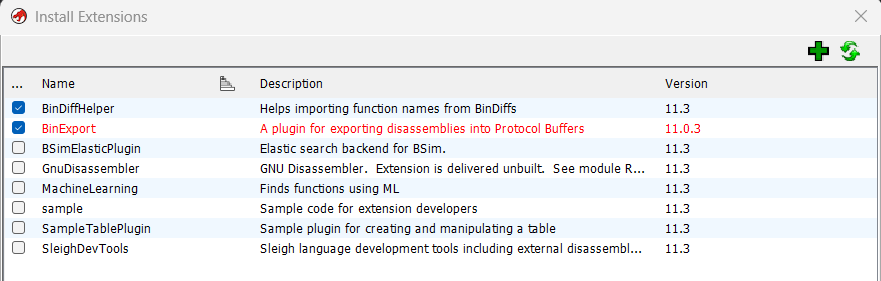
File -> Install Extensions -> Green Plus -> Ghidra Plugin Dir -> BinDiffHelper Folder -> Ok
Repeat for BinExport
You will receive pic rel; a version mismatch. This is not a problem and it will work fine enough. Install anyway.
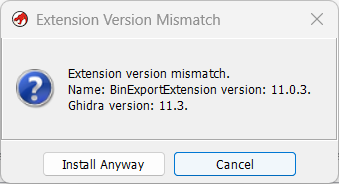
You will see BinExport in red.
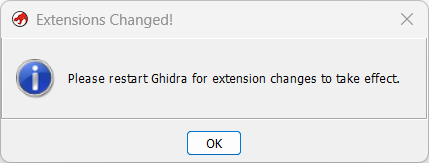
Click OK, then OK again. Ghidra will not close when you ok the restart popup, you must do it yourself.
File -> Import, or press the i key to import files. We want both the pre patch and patched versions to be imported. The default options are all fine as they are, nothing needs to be changed for both.
Now when you import them, if you have a funny res like I do, and you are unable to see either the top or bottom of this big bastard window, we close it with esc.
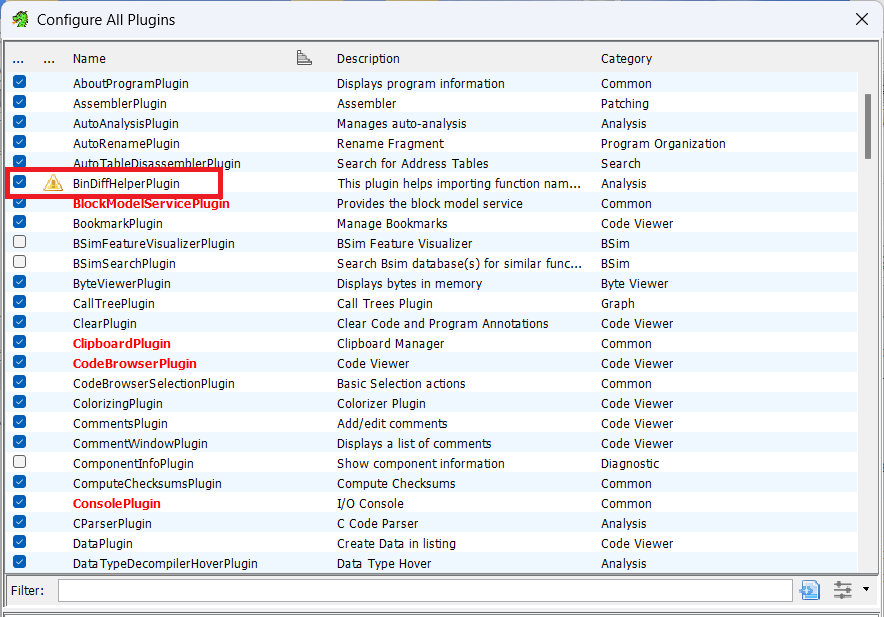
Double click the files we have imported. You will receive a popup saying do we want to configure the plugins.
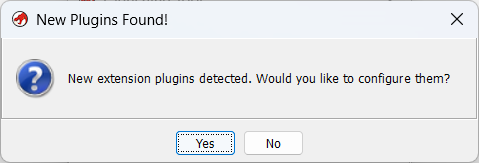
We say YES.

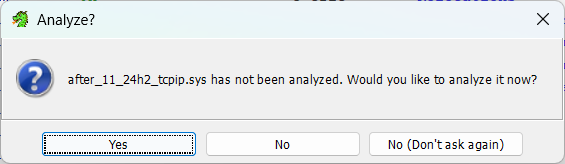
Tick the box in the resulting popup. Another popup will come up asking if we want to analyse the file. We say NO! We do not want to do this at this time. We havent set our symbol server up yet, so itll take an eternity to do nothing useful.
ALERT - ALERT - ALERT
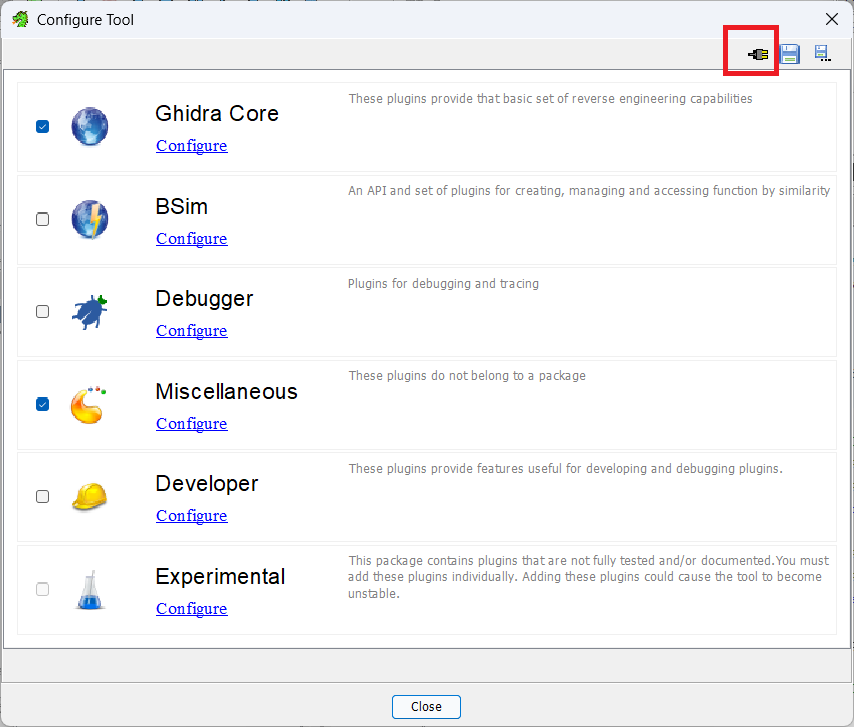
This has happened to me 0 times so I do not know what the root cause is, but 50% of my training participants did not receive the configure plugin popup when opening the imported file. If this happens to you, we are going to (on the code browser window for the file we have opened) File -> Configure, click the little power plug and tick it here.
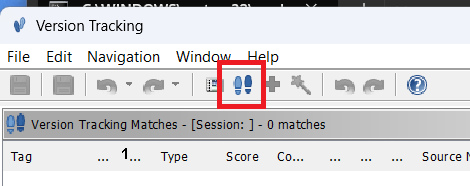
Back in the main project window, tools -> run tool -> version tracking.
![]()
Click the feet to start a new session.
Here is where we set the source and destination program. Now we need to have a little thinky here. We are looking for the differences between the unpatched version and the patched version. So we want to know whats different in the patched version. Which is our destination program; its where we want to go.
This is why it is very helpful to name your files appropriately so you can always identify with ease which one is pre and post patch!
Next, skip the checks, finish, configure plugins.
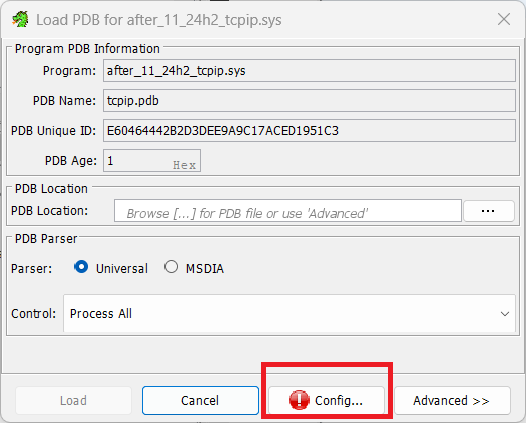
On each of the Version tracking windows that popup, we want to go File -> Load PDB File
We need to configure the symbol server now. Click the large red configure. It really shouldnt be red, surely another colour could have been used..
Set a local location for files to be downloaded to. I like to use C:\Symbols. Click the boxed icon to bring up the picker to select the folder.
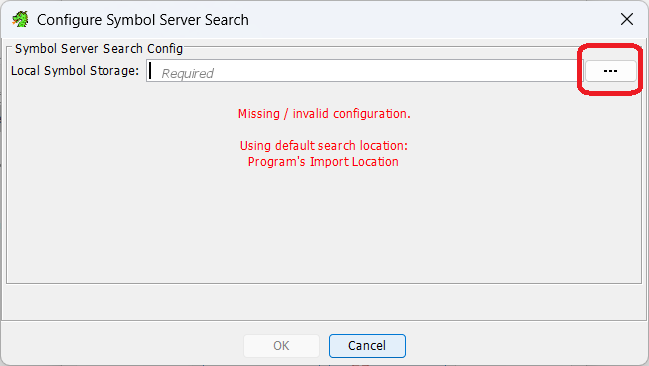
Click the plus sign so we can specify alternative locations for Ghidra to look. You need this, because theres 0 chance of you having the necessary files ready to go, and like you setting a machine to use itself for DNS, wont know where to get info it doesnt have it in its own repo.
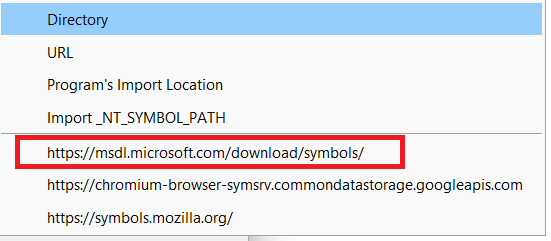
If it is all set it will look thusly:
To perform a search on the MS symbol server, you MUST click advanced EVERY TIME. I dont know why, but you have to. If you do not, it will only look inside the specified symbol folder and nowhere else.
We need to load the symbol file for both files. You can see here it doing a lot of stuff.
It might take a while. When it has finished (you will tell because the little blue bars stop moving) you MUST SAVE. After doing anything, you must save. Be mindful we are not actually doing anything against the real files themselves, but representations of little java objects who like to live in memory. And all these little java tools in their own little bits of java memory are all ephemeral until you SAVE THEM.
Once we have both files with their nice shiny symbol files, we are going to go back to the Version Tracking window and click the magic wand.
![]()
This will run a bunch of analysis over the two files. This is useful NOW, since we have applied the symbol files and Ghidra stands a chance of understanding what its looking at.
Once it is done, as with applying the symbol files, we need to save the Version Tracking window. Seriously just save all the time, everytime you do anything. Its all ephemeral until you tell it not to be, but you have to tell it not to be.
Diffing with Ghidra
Christ we are only halfway through this fucking blog. I knew I was avoiding writing this for a reason. Time for a coffee I think.
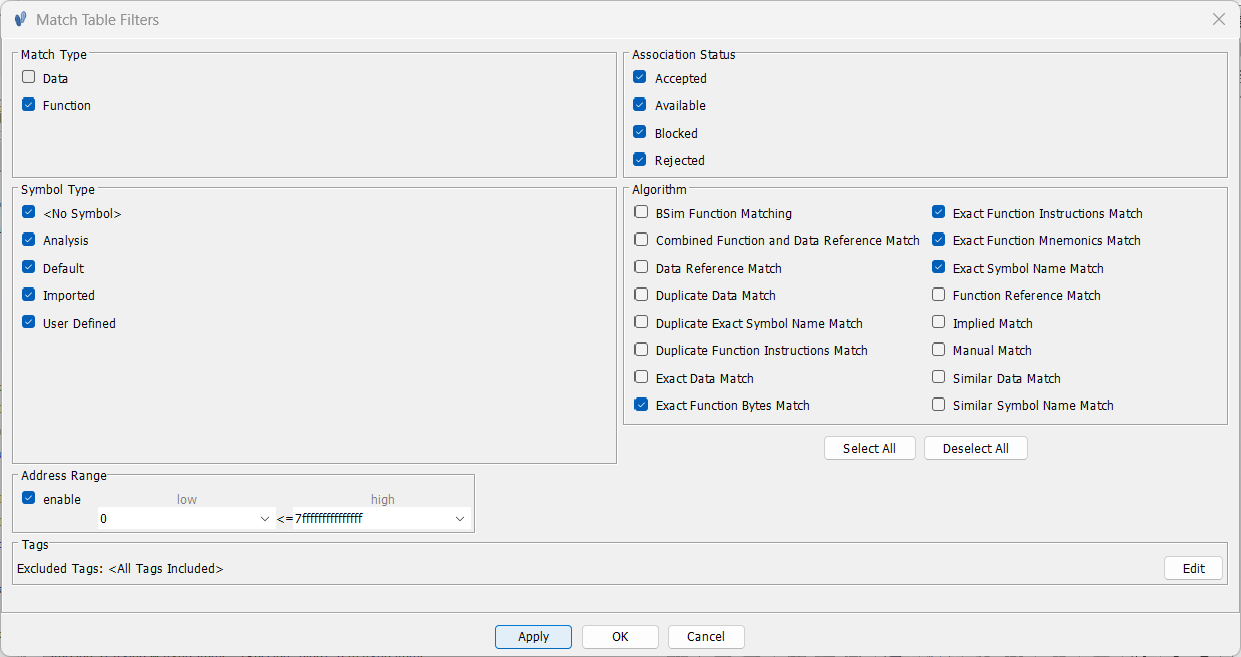
After running the checks, by default Ghidra prints all differences between the two files; stuff like variables, imports, headers. We are going to apply a filter to only see differences in functions. Remembering the objective here is to see what vulnerable function was patched out, we can see why this would be too noisy for us to sift through.
The lightbulb on right handside of the “Filter:” box is filter button. But theres two, because of course there is. The first one is the one we want.

There are lots of algos set by default. We untick all except •exact function bytes match •exact function instructions match •exact function mnemomics match •exact symbol name match
Untick data as the match type as well, leaving just function in the top left. It should look like pic rel. Press ok.
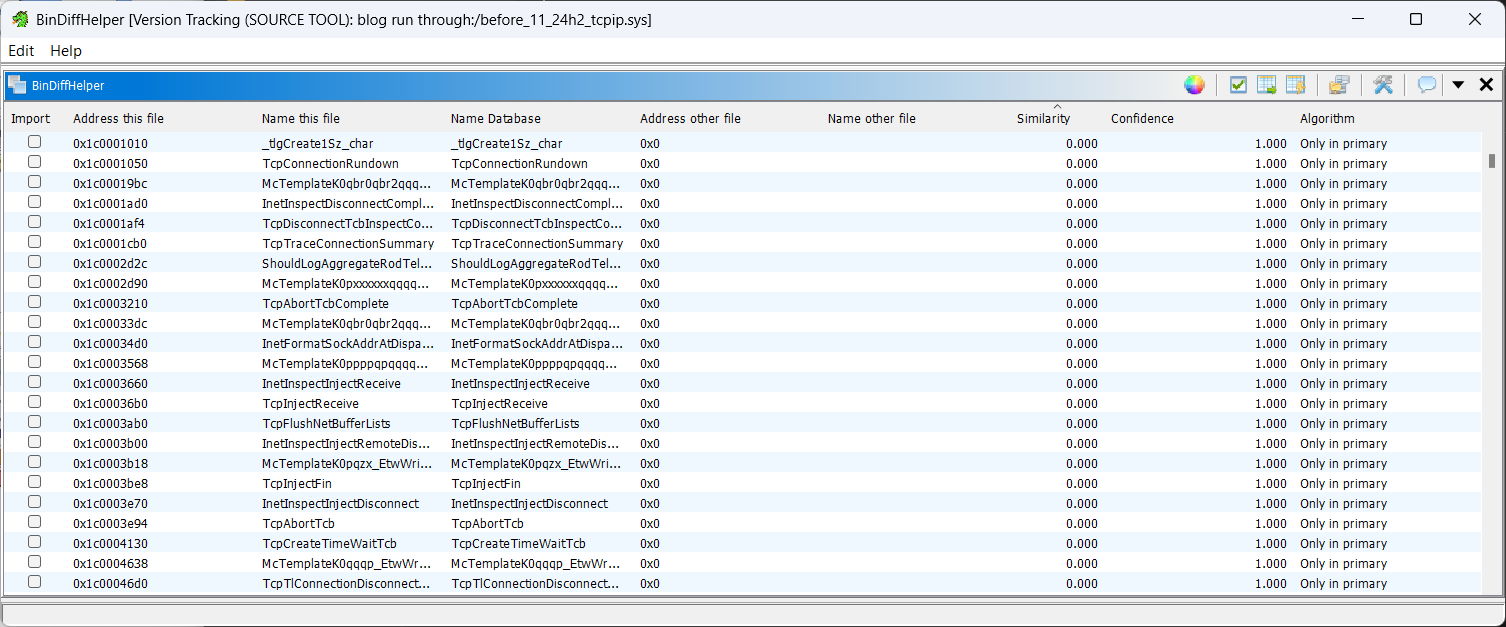
You might be wondering why we bothered installing all these plugins when Ghidra has its own inbuilt set of tools to perform these checks. The answer is simple; they suck. Look at this. This particular function which, spoiler alert, is the vulnerable function in question, is a completley different size in both files, yet still gets a 1.0 confidence rating on these being the same.
![]()
Enter our good friend BinDiff.
Go to before file, window, bindiff helper.
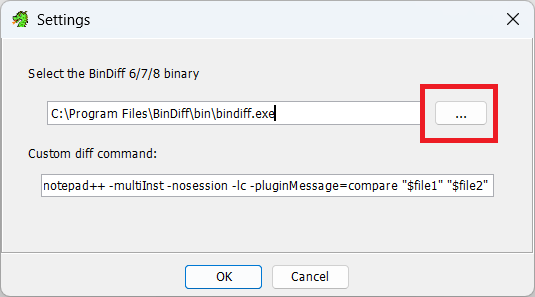
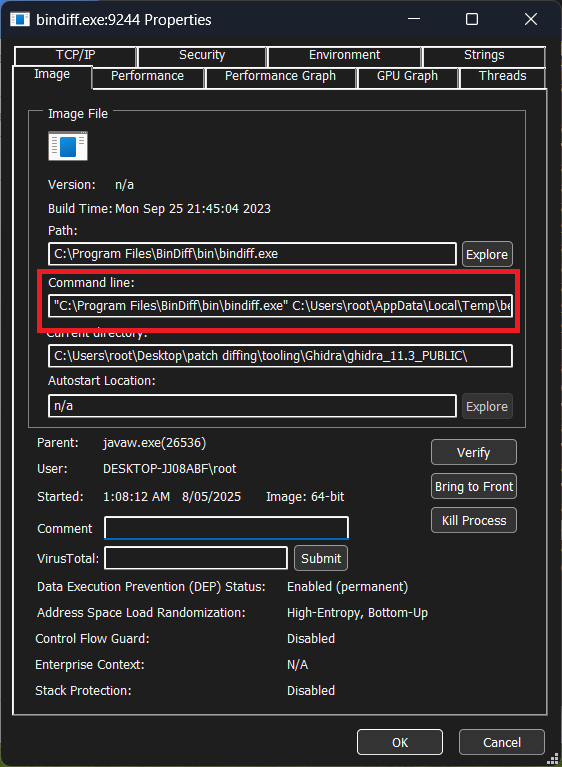
On the resulting page click the little wrench and tools icon.

You will note it lists the default bindiff install location. If this is where you installed bindiff, DO NOT BE FOOLED. It has not actually set the binary location! You still need to select the installed bindiff exe!! Default is c:/program files/bindiff/bin . I have no idea why this is the case, but if you do not set it, even if its where its default set, it wont work. V annoying.
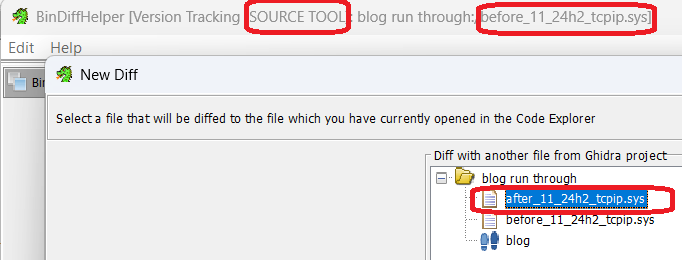
Now remember the process: we are in the BEFORE file, wanting to diff it against the AFTER file. So click the open button next to the tools.

And select the after patch. Sanity check; the source is the before file and we want to select the after file.
Now we wait..until it hits 40%.
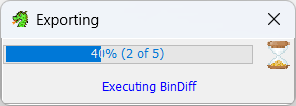
It will not progress any further. It cannot do it. There is something wrong with the way Ghidra calls BinDiff and it just cant do it. This is why we needed procexp.
Run process explorer, find the bindiff in there, double click it, copy the command line command, kill the process, open cmd and run the copied string.

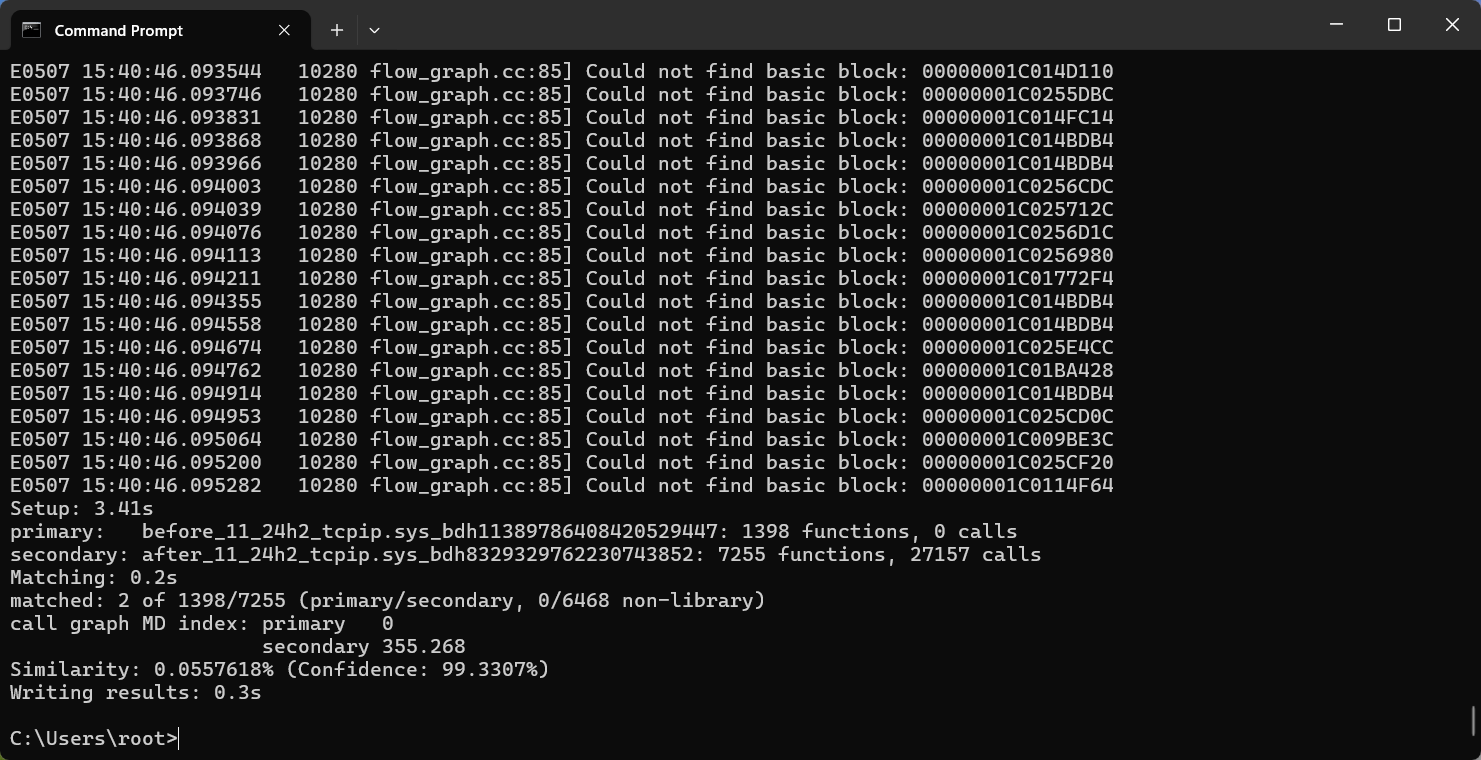
If you do not kill the bindiff process before running it yourself, it will rpoduce a fucked file and be worthless and youll need to repeat this.
This will provide us a diff file in the specified output location. Mine tends to be in C:\Users\root\AppData\Local\Temp, but is specified in the copied command. If you are going to move the resulting vs file, you must move the other two files too!!

You will see the resulting error (lol).

Close the bindiff window, and click the new diff button on the source file again. This time we are going to select “Use externally created .BinDiff file”, and load up the VS file. You must click this obnoxiously small “load” button down here too. Next.
Now at the enxt screen, remember what we are doing. We are doing a diff of the source file against the changes made in the patch, as we have started the diff in the source file. The hash of the before will be green, indicating it is matching. Tick the radio button in first file and next.
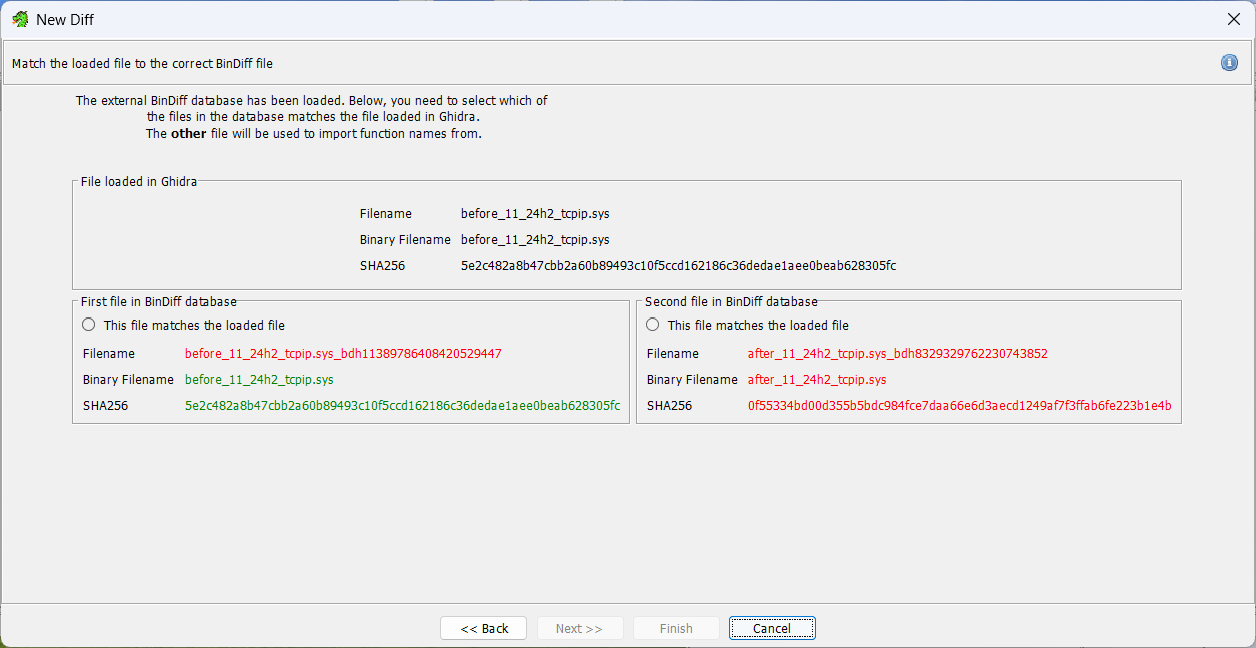
We do NOT want to attach another file, we just go finish.
If you are seeing things like this, you have not applied a symbol file along the way. This is why we must save at every step. Close Ghidra, delete the bindiff files, reopen, reload the pdb, SAVE. Redo the wand, SAVE. Do the diff.
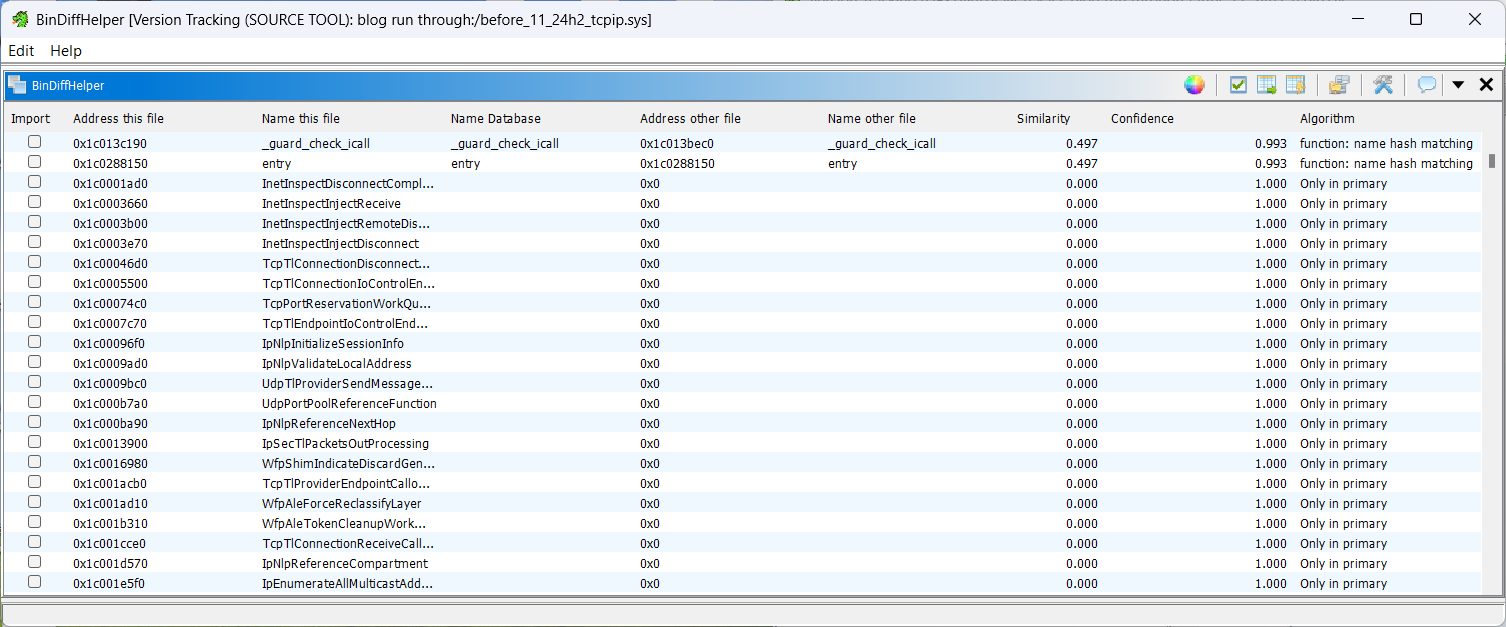
However, if you see output like so:

Then the diffing was succesful.
Note that Ipv6pProcessOptions is different. The cve is an ipv6 issue, so this is good.
If you do not have that particular function uptop, click on “Similarity”. This will sort the table, and is why it is important to ensure if you are following along, you update your tools! That functionality only came in during the time I was compiling this training session, and is a LIFE SAVER.
Using version tracker windows we can compare the decompiled code of both versions
The filter tab is actually a search bar. Silly name but anyway. Look for ipv6pprocessoptions. The filter tab is not case sensitive.
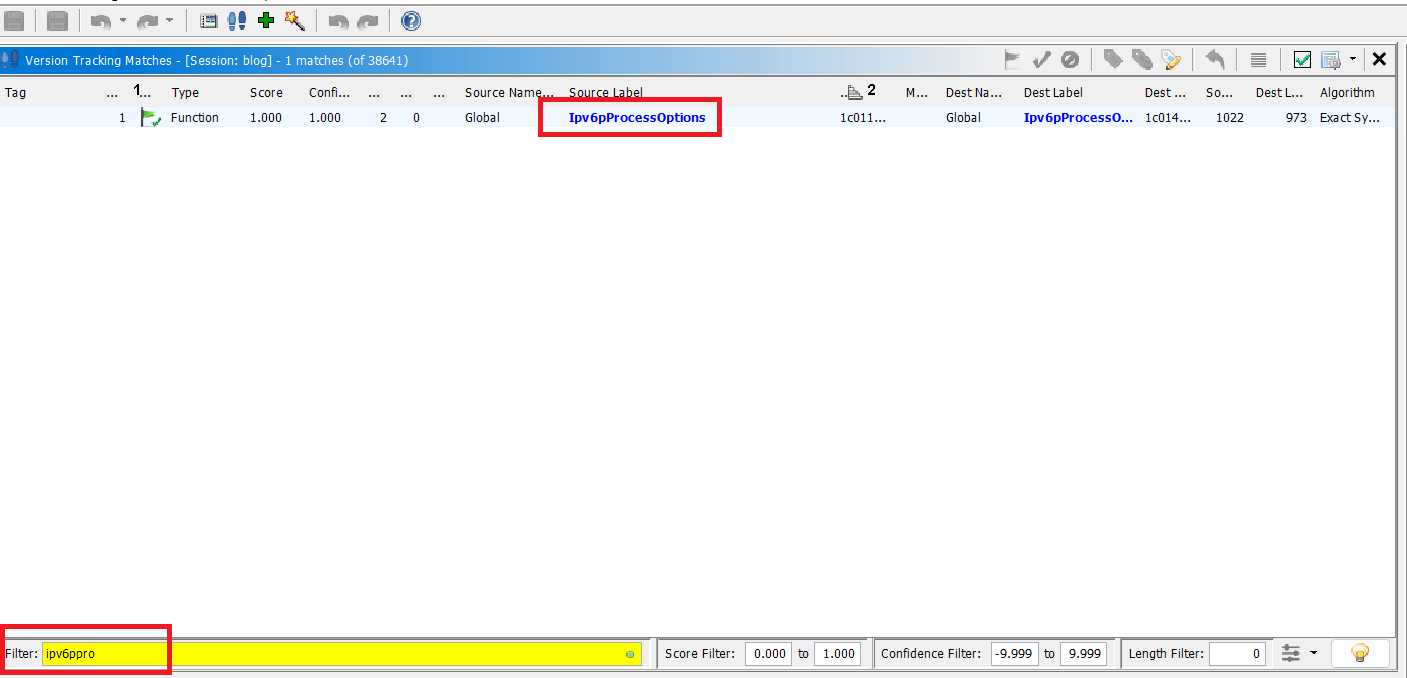
Once again, take note of the source length and dest length are different, yet the confidence and scores are still 1. It may have been a mission to get here, with these external tools, but they work and they work right.
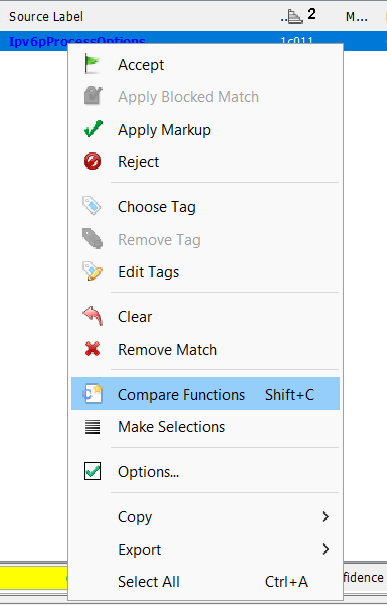
Right click on the function, compare functions.
Scrolling is in sync view thank god.
Right at the end we can see there is a change made where IppSendError is called instead of IpSendErrorList after IppDiscardReceivedPackets is called
We can see iVar4 = Feature_552672569__private_IsEnabledDeviceUsage(); this is a particular ms function sometimes added to enable partial patch rollbacks.
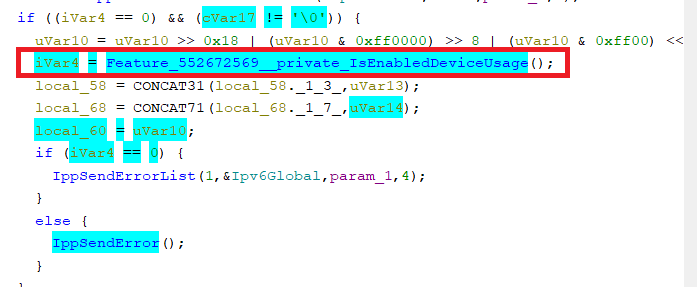
It checks for a registry setting, which is set will make the function return false, so the original code is executed instead of the patched version. Because we know ms patches break things this lets a sysad “unpatch” a single vuln without removing the entire rollup
This functionality is not important for exploitation, but is helpful when diffing as it draws extra attention to what is being patched out. Remember we care about whats different between patched and unpatched, so we have now honed in on IppSendErrorList being the problem child.
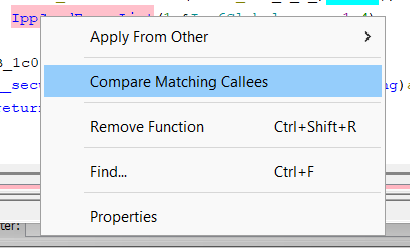
Lets right click it and “Compare Matching Callees”.
The window will immediately switch to the new function; down the bottom of the Function Comparison window you can switch between the functions we have exploded.
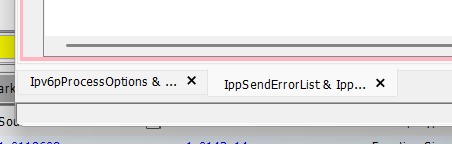
So we can see the sum total of patch is for the machien to be using IppSendError instead of IppSendErrorList if the patch is set. Lets now see if we can hit any of these functions within a debugger.
Kernel Debugging with Debugger on Host via Comm Ports
Depending on how you are setting your environment up, ie with a virtualized debugger or putting it on your host machine, there are very different ways we connect to the target machine.
Now this is another one from the “well thats blindingly obvious” category, but it is worth mentioning; we are looking at kernel files here. We will be doing kernel debugging. How, can you hit breakpoints on the kernel on your vulnerable machine, if it is also holding the debugger? You cant, which begs the question of why its even an option in windbg and I will not be listening to answers because I do not care.
So we have two options; set windbg up in its own vm, seperate from the testing vm, or set it up on our host machine, also seperate to our testing vm.
First we will go through having windbg on your host machine. As proud as I am of the work I did to get mona running under windbg preview, I had little desire to go down the VM rabbit hole again (you will note there is a section of this post on that, as it turns out people in my training session did want that themselves)
And my faith was rewarded, as this is actually (comparatively) simple.
Configure the Target VM
You’ll need to set up a virtual serial port in VMware and configure Windows on the VM for kernel debugging. Step 1: Add a Virtual Serial Port in VMware
•Power Off the VM.
•In VMware Workstation/ESXi, go to VM Settings.
•Click Add Hardware → Select Serial Port.
•Choose “Output to Named Pipe”.
•Set the pipe name according to the rule set below
•Click Finish and then OK to save.
VERY IMPORTANT POINT HERE: this is another one from the Captain Obvious Sagas (TM) but it is worth pointing out; the VM MUST be set as the “server”. This means the machine is set to create the pipe, not just receive it. This will NOT work if you set the first drop down to client. The second one however, makes 0 difference which one you set it as. Both work and I have tested extensively.
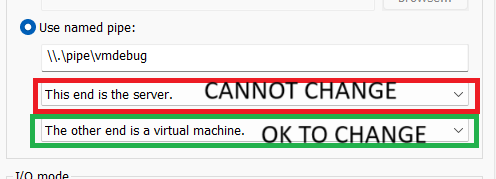
Named Pipe Rules
MUST start with
\\.\pipe\
This is a requirement for all named pipes in thr windows nt namespace
There are a LOT of rules regarding valid names, honestly best to sidestep all of them and just use word_word. slashes, colons, wildcards and certain single word names all have their own issues.
•underscores are fine
•az AZ 09 are fine
•tacs are fine
Linux does NOT have any requirements for named pipes, except that you can make the file. (since everything is a file on linux, ergo pipes are files). But thats not really relevant now, is it?
Enable Kernel Debugging on the Guest OS
Boot into the VM, pop cmd as an admin and run:
bcdedit /debug on
bcdedit /dbgsettings serial debugport:1 baudrate:115200
I have spent time looking into the port numbering scheme. Workstation by default will assign the com port to port 0, within workstation. Windows however will take it as 1. This can be changed by modifying the vm ini files to assign another port, but I saw no need to dig into it. The point I am getting at is if you have added a single serial port, the port we want to set for debugging will ALWAYS be 1, despite what the hypervisor is calling it.
Restart the VM to apply changes.
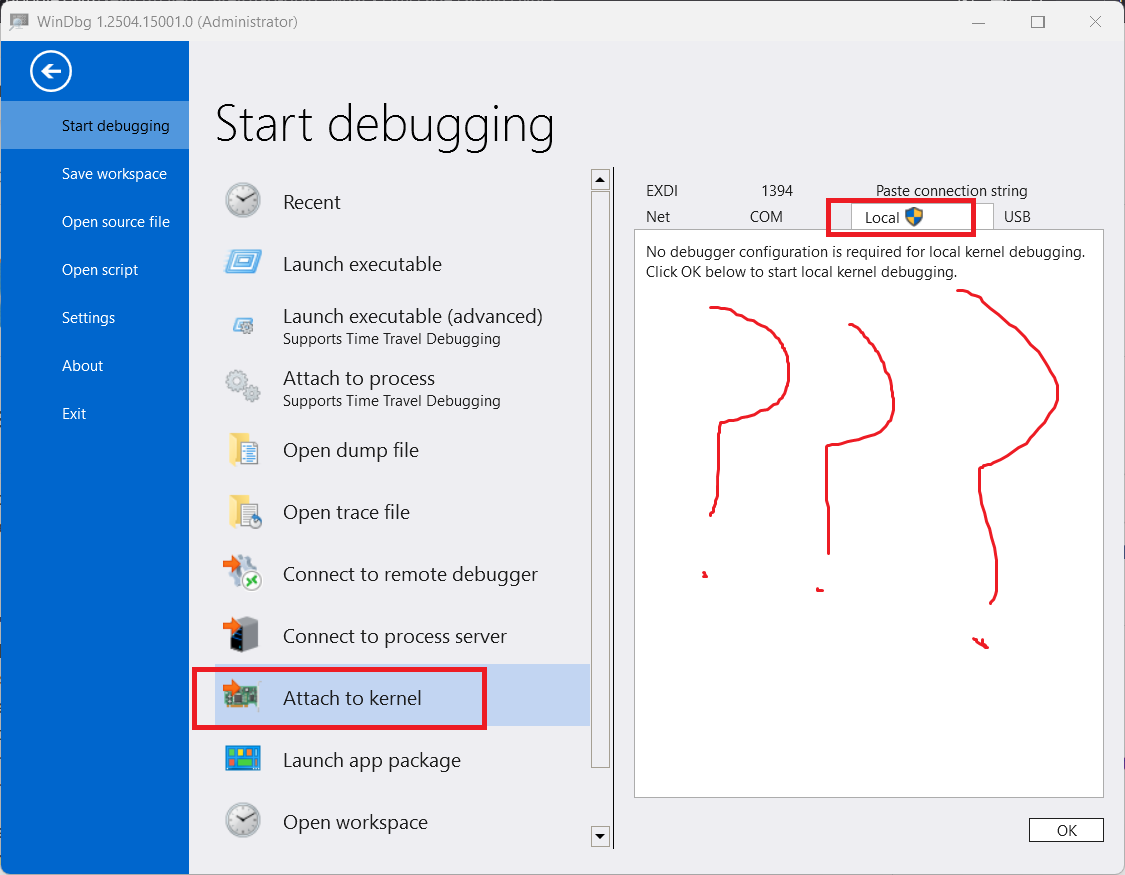
Configure WinDbg on the Host
When trying to do kernel debugging, you MUST run windbg as an admin!
Once the debugee vm has booted, click file, and set up your settings as below. When possible, I like to break on connection. By default the port box will only contain a name, no suffixes. Prefixes? Do not be fooled by this; we must still include the .\pipe\ portion for the connection to work!
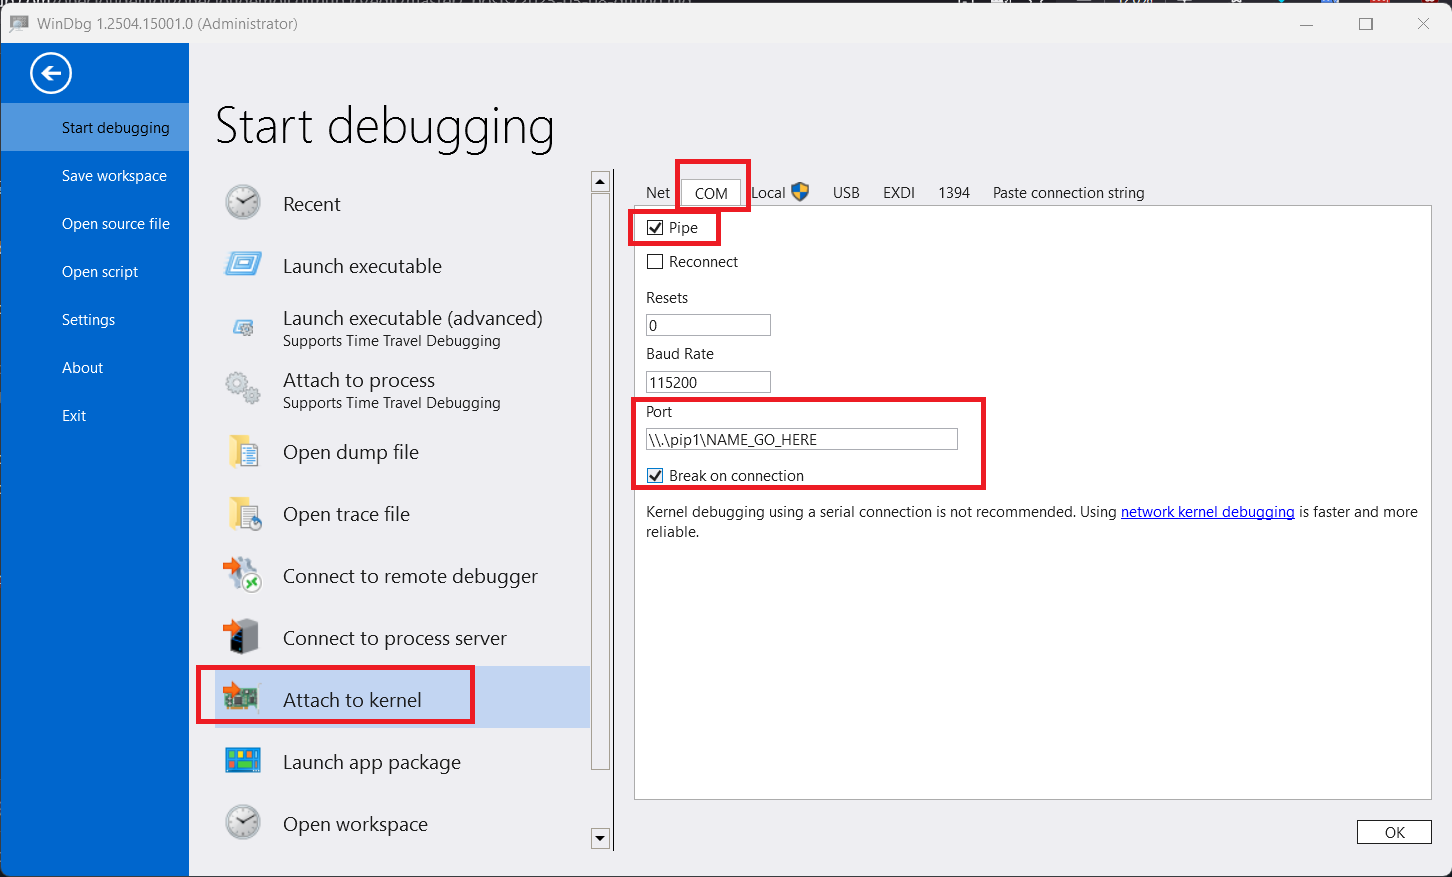
We are now ready to enter dbg; configuration has concluded. Click here to skip over the vm to vm configuration
Kernel Debugging with Debugger in VM via Network Debugging
There will be no screenshots here; I am at the end of my tether getting this together. VM to VM kernel debugging is a terrible way to do things, it is insanely slow between my vms for no good reason and everyone in the training session had the same experience. I will not ever be doing this, but it is noted because I want to purge these notes.
Find and install the Windows SDK. Why? Because Microsoft says so. I have read a LOT of MS doco in my sysad career, and very, VERY few times do they ever say “hey this is a bad idea”. Once was a fucked situation involving hybrid exchange server cutovers me and my hacking homie essentially developed the pathway for because the doco had no pathway, so that gives you some indication that when MS say “hmm are you sure” instead of letting you blow your own head smoov off as usual, you probably should pay attention.
Go to C:\Program Files (x86)\Windows Kits\10\Debuggers\x64, pop an admin CMD console
kdnet.exe <HostComputerIPAddress> <YourDebugPort>
.\kdnet.exe 172.16.250.56 50000
You can choose any port number from 49152 through 65535, 50000 is just the default when you open windbg.
You will receive a key, make sure to copy this or you will eseentially brick the machine (reversable, see a bit further below to fix)
Unlike VM to host where we want to connect once the target machines bootes, we set up the windbg vm so its waiting for a connection BEFORE restarting the target machine.
This is because kdnet is making changes to your boot config, where it will not continue to boot unless it makes the connection. So you need to be ready to catch the pipe its throwing at your stupid shiny melon.
Reboot the machine and wait. A LONG time. Dont freak out, it will most likely take about 15 minutes before making the connection to windbg. This, over dozens of reboots and trials and tests to prepare for the training session, seems to be normal. It will get there!
As we can see this is MUCH, MUCH slower than doing it via com ports, but if you insist on having a seperate vm, this is how one would acheive it.
To make your machine usable again we revert from snapshot (you did take one didnt you?) or force it to reboot a bunch by kiling the power, and when we get to the repairer, run
bcdedit /set {default} debug off
You may notice this is different than what we ran to set it; the tldr is when not specified, bcdedits will amend current, which is not the same as default. We need to specify default because the current when in edit mode is {bootmgr} which does not actually use the debug option, so its amazing it even accepts it. it will NOT allow your machien to boot normally if you do not set it to edit the {default} at this menu!
Since we are not actually in the OS yet, to reboot run wpeutil reboot
in the cmd that you can pop.
After disabling, to re set it up over winsock again we need to retun kdnet, doing so will give you your old key (as long as you do not change ports or hostname from previous time).
It is very advisable to NOT AT ALL set break on connection, it is VERY PAINFUL to try and get a booting windows to continue to boot.
Verifying connection with windbg
This is going to be a small little bit of dbg info, youd be better off finding another source for more indepth explainations of things but I will give you what I put out in the training session:
Once connected and the connection breaks (if it doesnt break itself but is connected, manually break with the big blue break) we run !process 0 0
You will receive output like thus
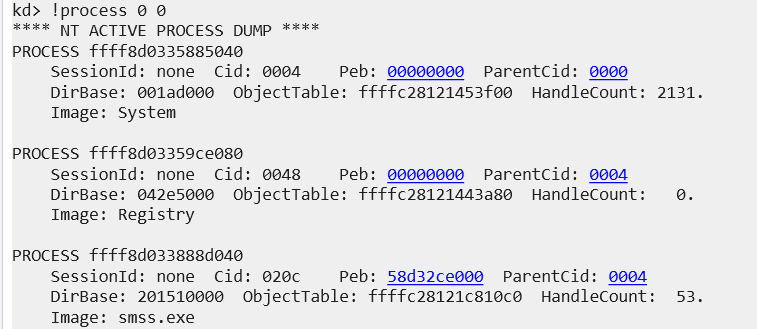
Where it lists the current processes. I like to use this as a final sanity check to confirm that yes everything is working as expected.
Like Ghidra, we want to set our symbol path.
.sympath srv*C:\Symbols*https://msdl.microsoft.com/download/symbols
The dir between the asterix is where on your debugging machine to store symbols. You can set it anywhere; I set it to use the same folder as Ghidra does. The second argument is where to get symbols from.
We must MUST now reload the symbols, with .reload
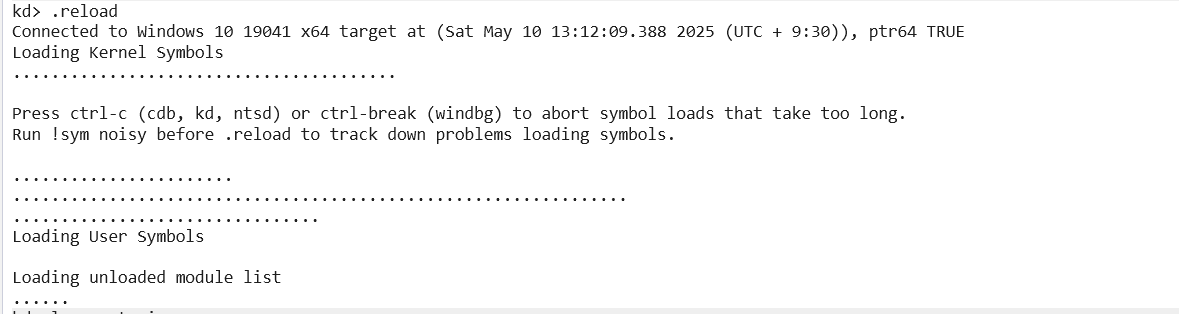 Pic rel will show that it is infact loading the symbol files.
We now verify that symbols are indeed loading:
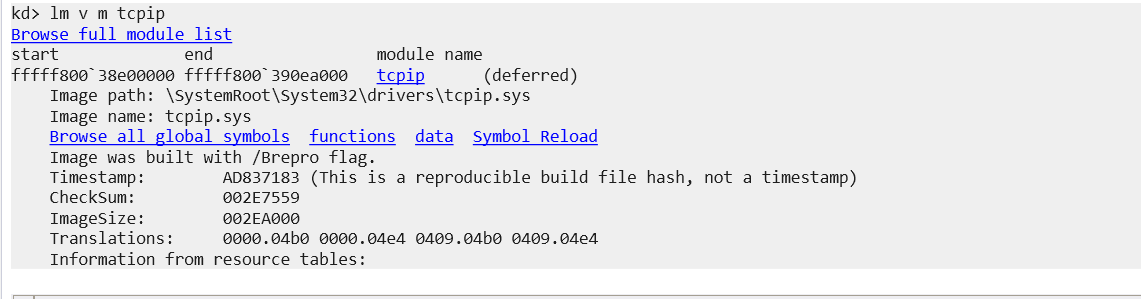
lm v m tcpip
lm to list module
v to display verbose output
m for module name filter
Once symbols are properly loaded, time to set breakpoints:
bp tcpip!Ipv6pProcessOptions
If the breakpoint is accepted, you’re now fully set up.
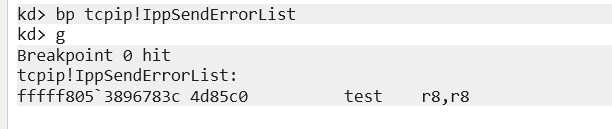
We can also set bp tcpip!IppSendErrorList to hone in on that particular function!
You can set breakpoints on any symbol that the debugger recognizes, as long as symbols are loaded properly.
Once the breakpoint is set, send g to get the target to go. Now we can hit it with a precanned poc available from here.
If you are unable to trigger a bsod when sending the vuln, it has been discovered that you must reduce the core count on your VM. Its actually astonishing this one got as much hype as it did; its basically unexploitable in the wild because you need VERY slow machines for this to trigger. Drop the core count, and ensure you have actually set an ipv6 address on the adapter you are wanting to hit (I used fd00::1 on the vm and fd00::2 on my attacking box just to keep things nice and simple).
This concludes the post. It has been ardous and onerous and I have been avoiding writing this for some time. I am glad it exists so I can quickly move through these small hurdles next time I go down the patch diffing route, but this is by far the largest post I have ever written and given my output over the past six months, I am a bit tired. As alluded to in the GRPO finetuning post, expect to see more gaming related content upon your next visit.